Use your own provider account and an existing database or board. If you need a new destination, create it in the provider first. Contacts and receipts need separate connections.
Existing destination
Connect Notion
In BusyTrip settings, choose Connect Notion.
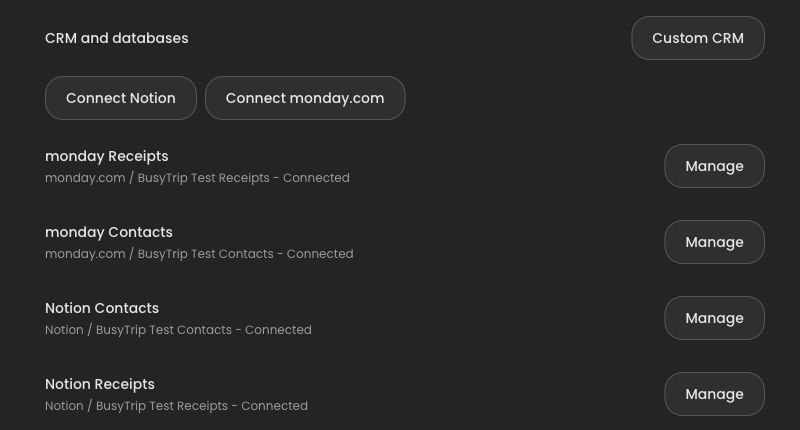
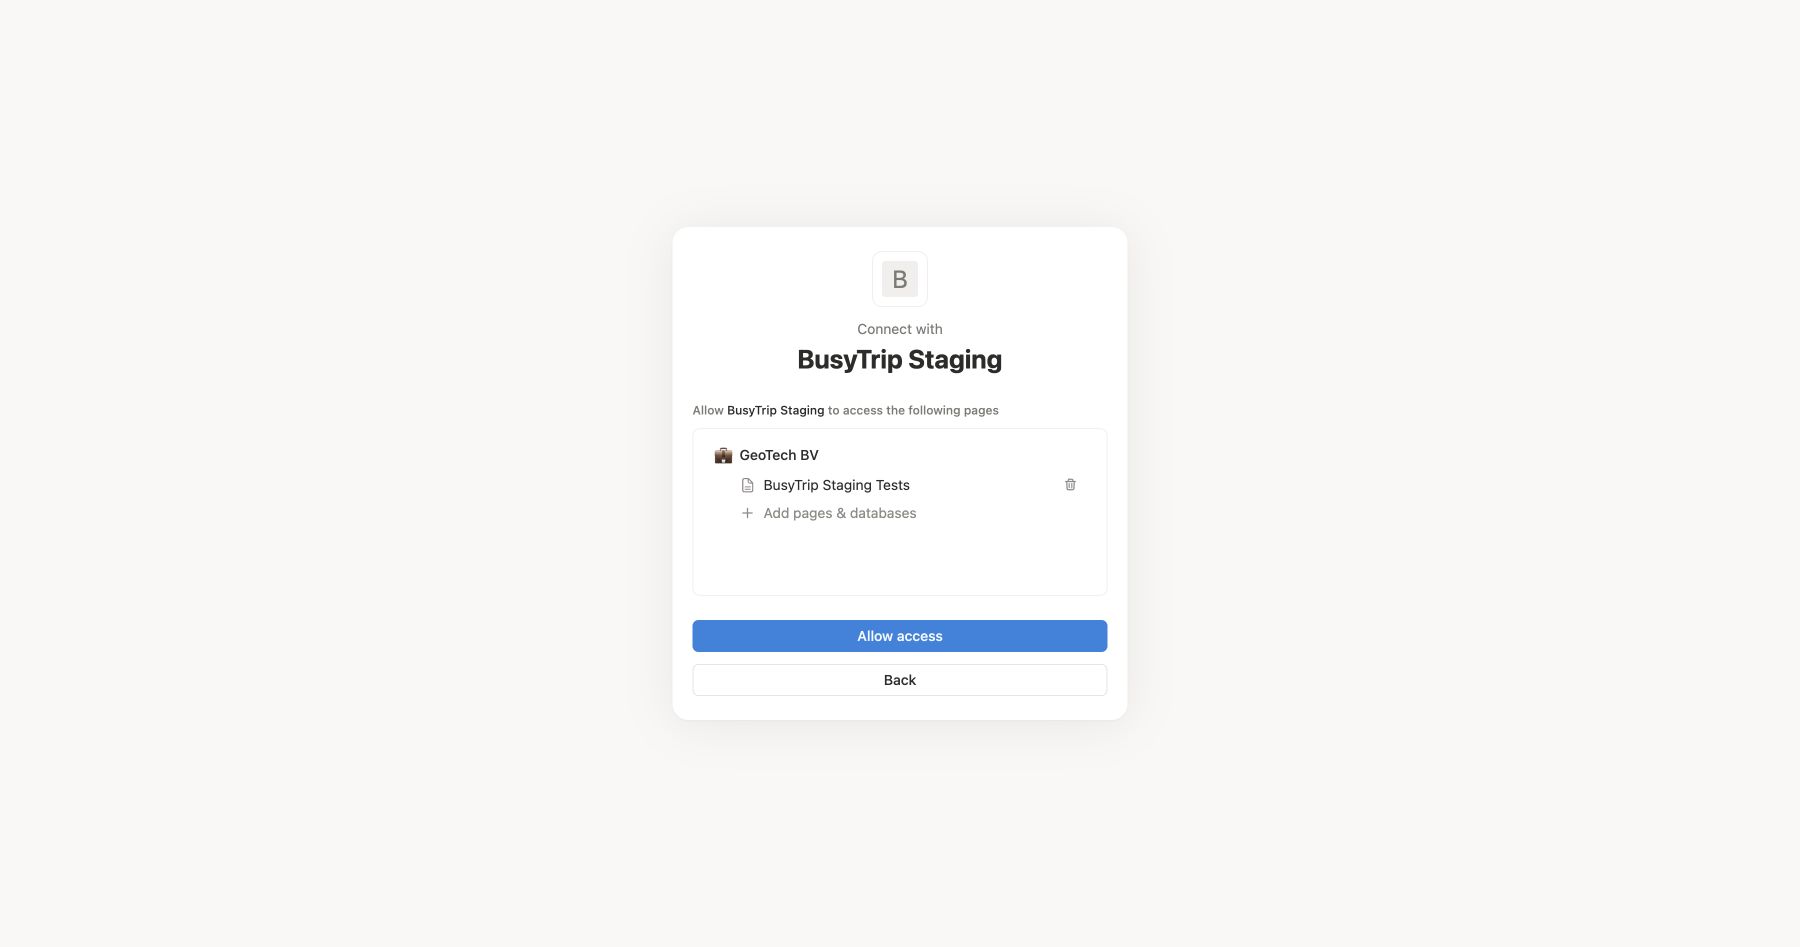
Open screenshot at full size Choose what Notion shares
Review the provider authorization and share the page containing your database. This screenshot uses a test page.
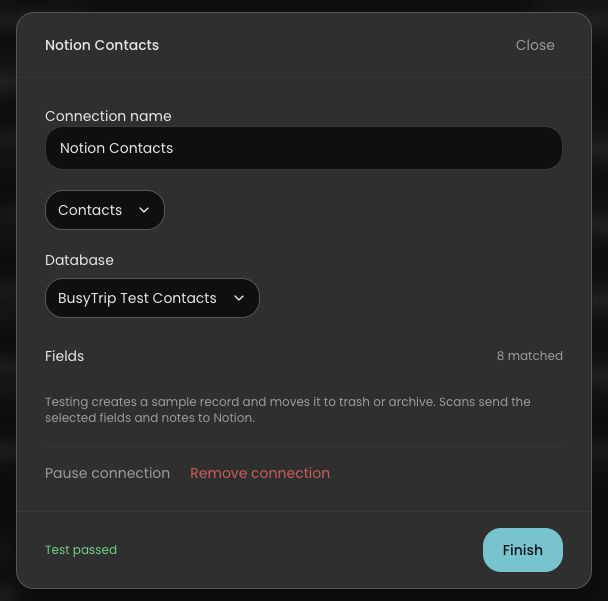
Open screenshot at full size Choose contacts or receipts
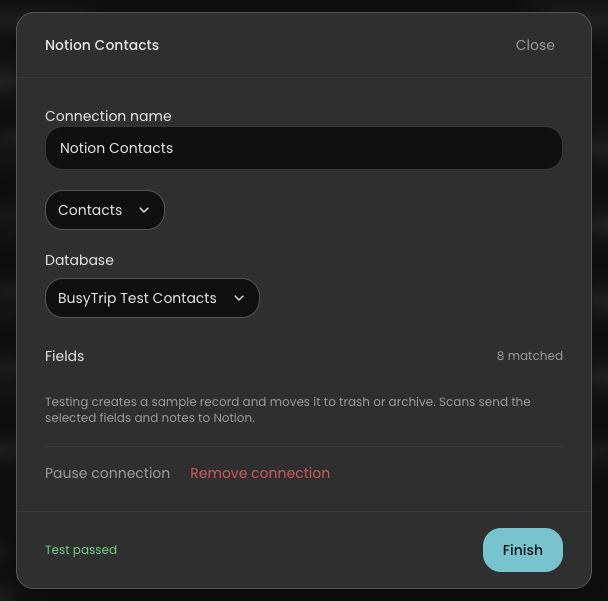
Name the connection, choose the scan type, then select your database.
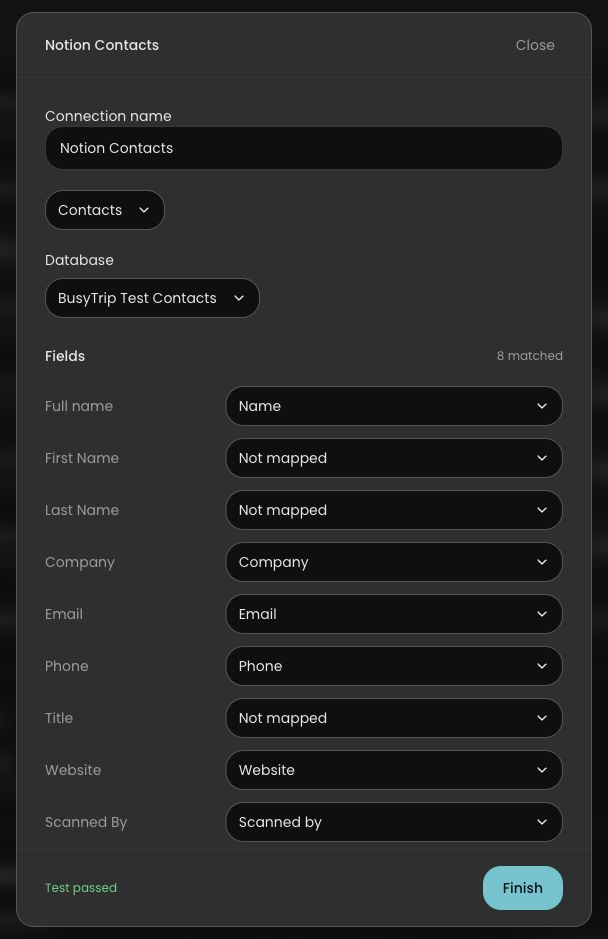
Open screenshot at full size Review the matched fields
BusyTrip matches compatible columns by name. Open Fields to adjust any match.
Open screenshot at full size Test, then finish
Run Test connection. It creates a sample and requests cleanup. Finish after the test passes; check the destination if cleanup is uncertain.
Open screenshot at full size Receipts use the same flow
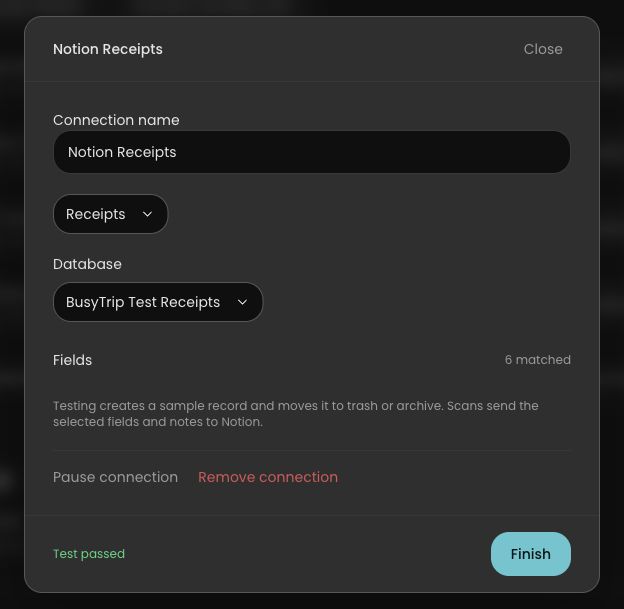
Choose Receipts and your receipt database. Use a separate connection if you want both scan types.
Open screenshot at full size
Start from scratch
Create a database in Notion
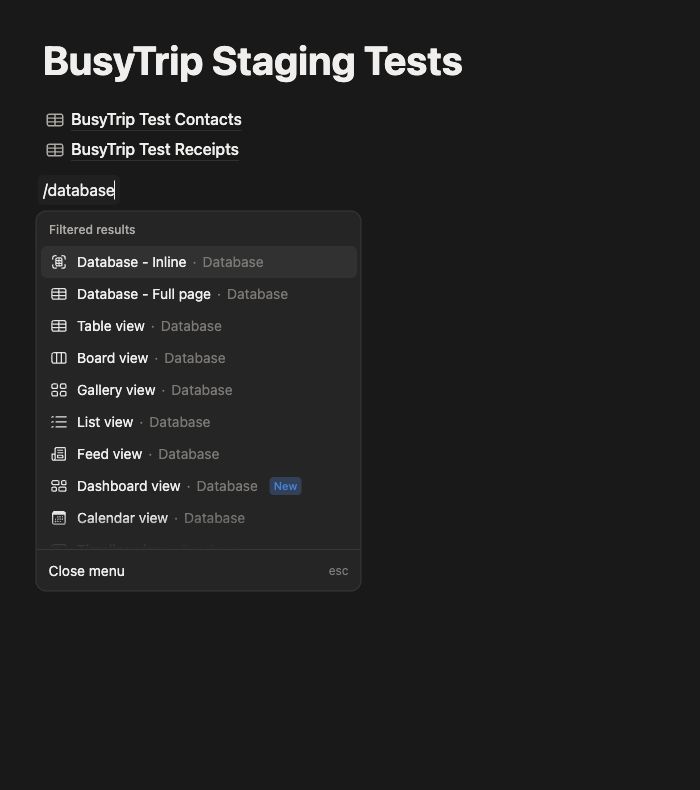
Inside your chosen parent page, type /database and choose Database - Full page, then New empty data source.
Open screenshot at full size Add the required properties
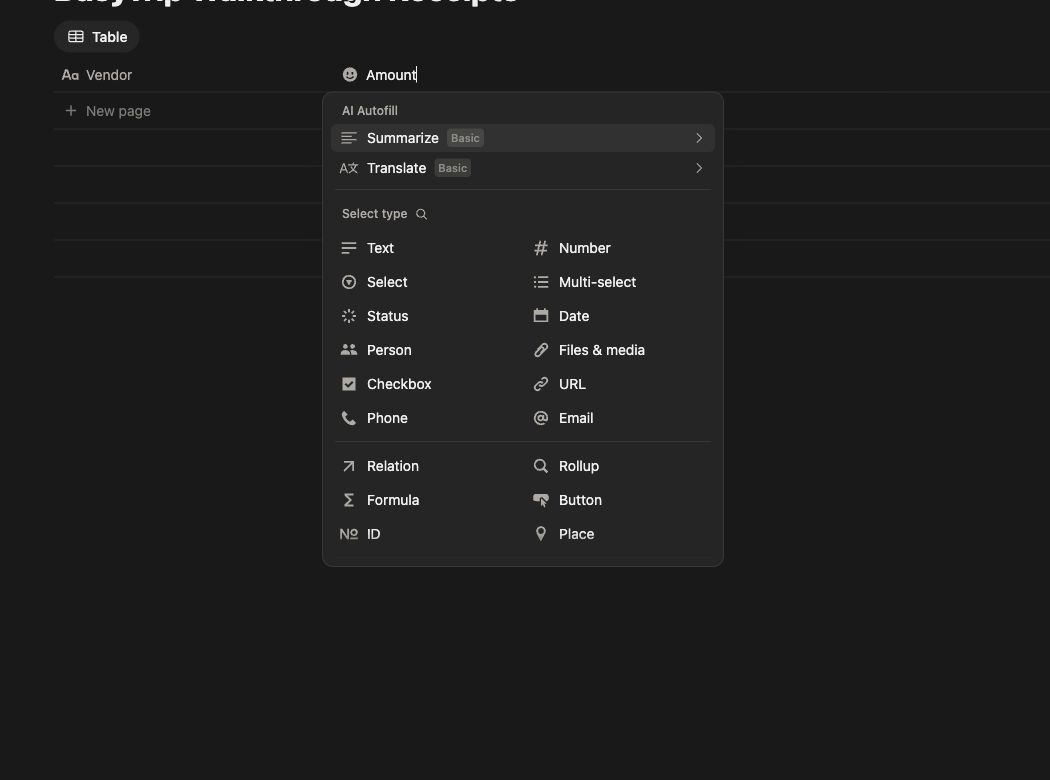
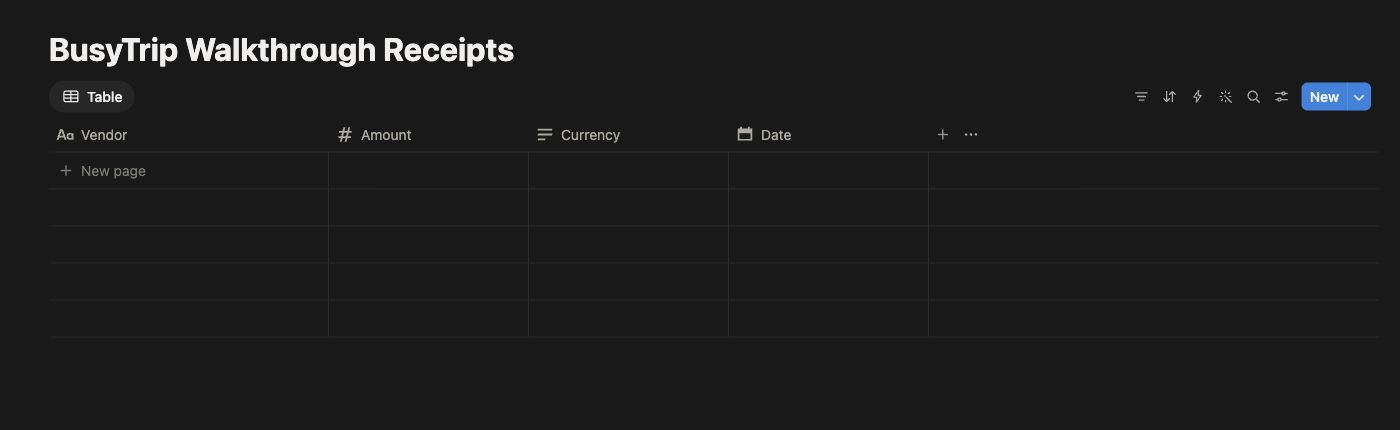
This receipt example uses Vendor (title), Amount (number), Currency (text), and Date (date). Add other properties for the details you want to send.
Open screenshot at full size Your empty destination is ready
Create it beneath the page shared with BusyTrip. No sample contacts or receipts are needed.
Open screenshot at full size Connect Notion in BusyTrip
Choose Connect Notion. Create the database in Notion first; BusyTrip connects it and suggests field matches.
Open screenshot at full size Share the containing page
Allow the page containing the new database. Child databases inherit this access.
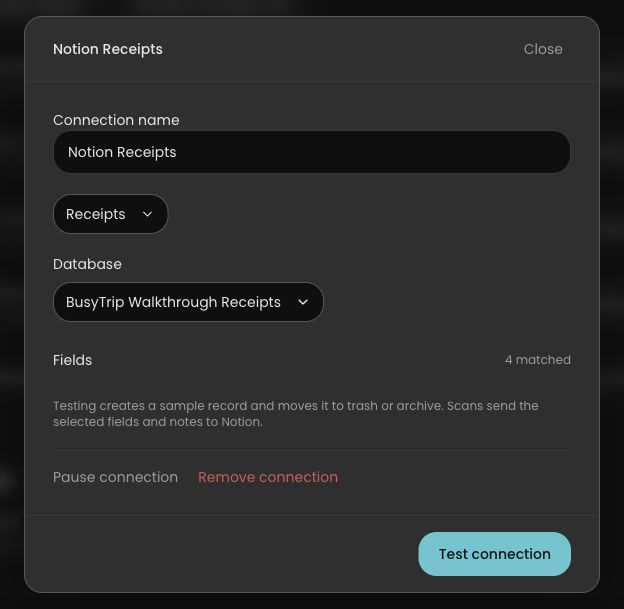
Open screenshot at full size Select it, test, and finish
Choose Receipts and the new database. Review the matched fields, click Test connection, then Finish after the test passes.
Open screenshot at full size
Before you finish
Review where each detail will be saved. Available fields depend on your destination’s schema; the counts in these examples are not limits. You can adjust the matched fields before testing.
Test the connection and finish only after it passes. The test creates a sample and requests cleanup; if cleanup is uncertain, check the destination before retrying. Provider audit or recovery copies may remain.
Only mapped fields and notes are delivered. Native Notion and monday.com destinations do not receive the original badge or receipt image.
Example screenshots captured September 19, 2026 in test workspaces. Your names and fields may differ. Provider authorization screenshots show a test app. Review the account and permissions shown in your own authorization screen.
10 free scans a month. No card required.