Use an HTTPS MCP server URL and an API key if required. Your CRM needs suitable tools and a destination for the selected scan type. Ask your administrator about unusual setups.
Contacts
Connect your CRM
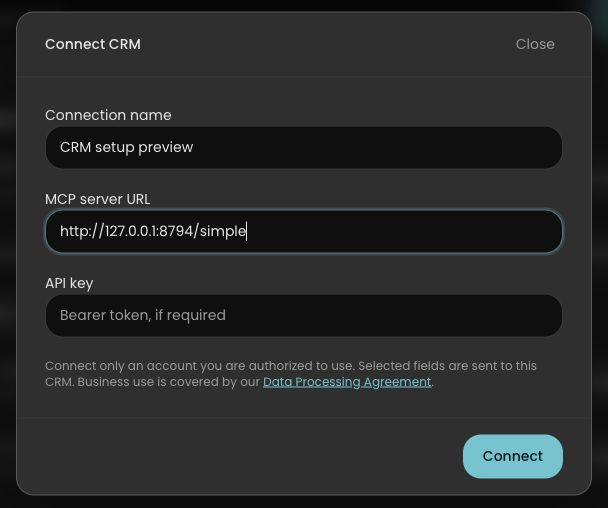
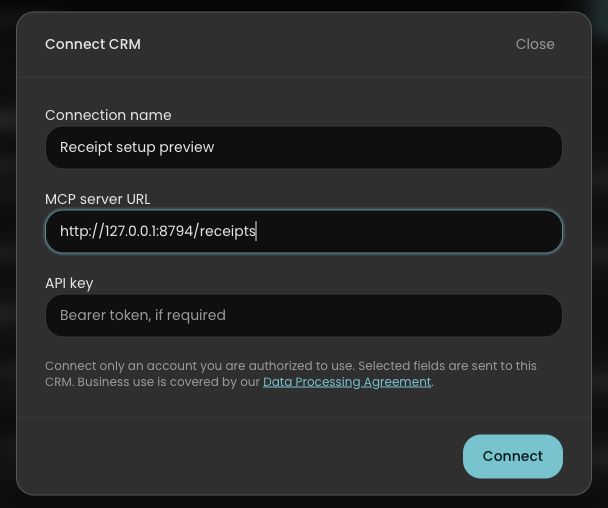
Enter your administrator’s HTTPS MCP server URL and API key, if required. The loopback address pictured is a local test fixture.
Open screenshot at full size Choose what to save
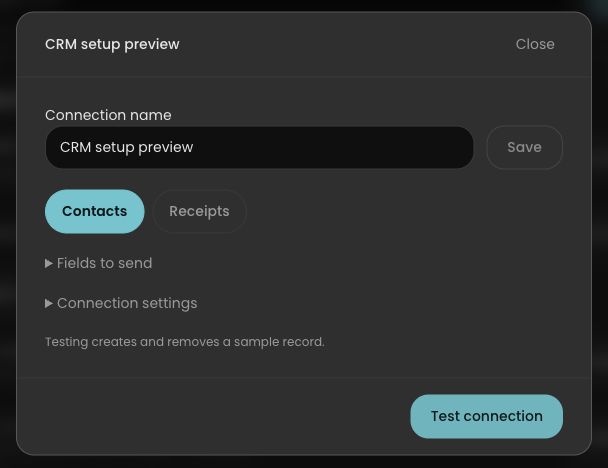
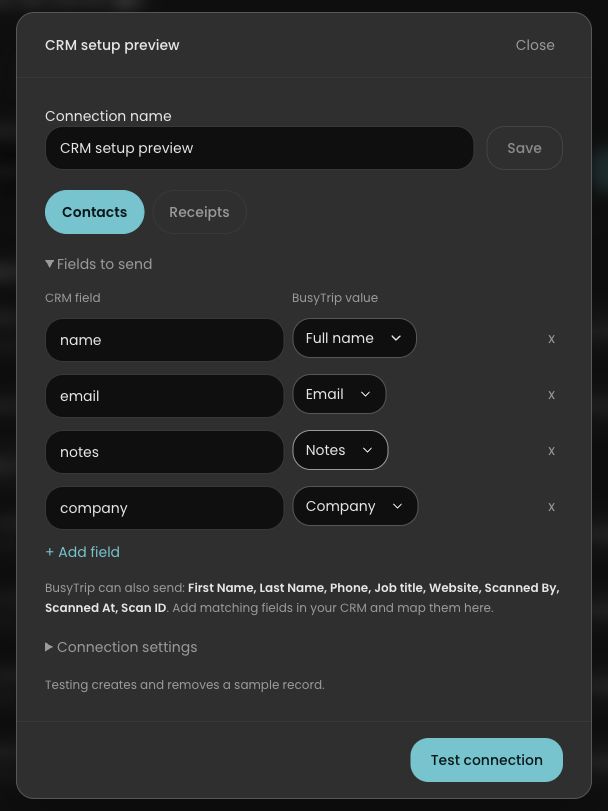
Choose Contacts or Receipts. Open Fields to send to review the mapping.
Open screenshot at full size Send more information
Unselected BusyTrip fields appear in bold below the mapping. The list updates as you choose fields.
Open screenshot at full size Test, then finish
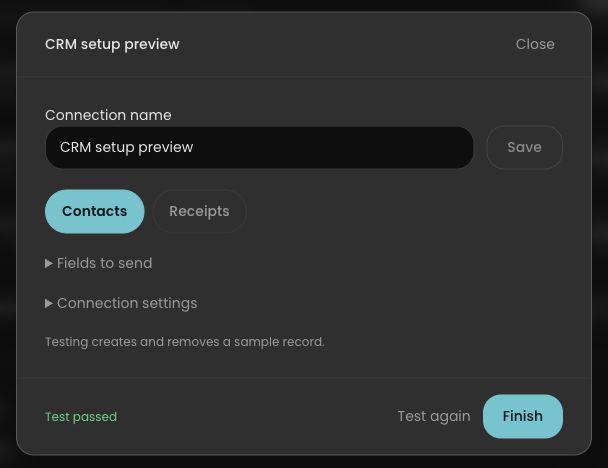
Run Test connection, then Finish after it passes. The sample is checked and cleanup requested. Check the CRM if cleanup is uncertain.
Open screenshot at full size If a field needs attention
This example sends Email to an unrecognized field. Click Review setup to correct it.
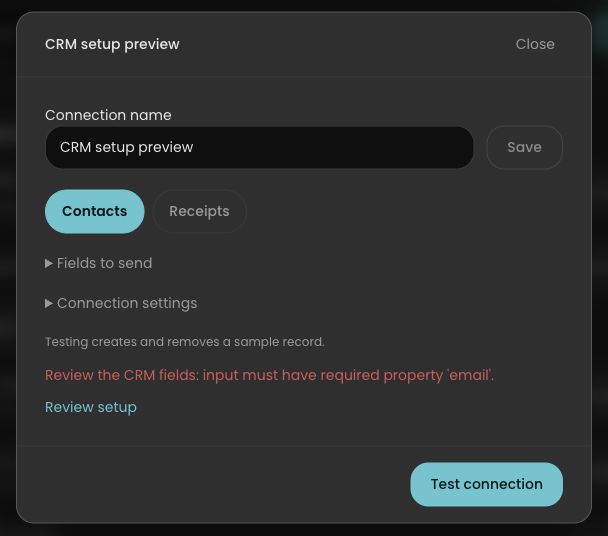
Open screenshot at full size Review the field mapping
The CRM requires email, but this mapping uses unknown_email. CRM field names are on the left; BusyTrip values are on the right. Correct the field in the next step.
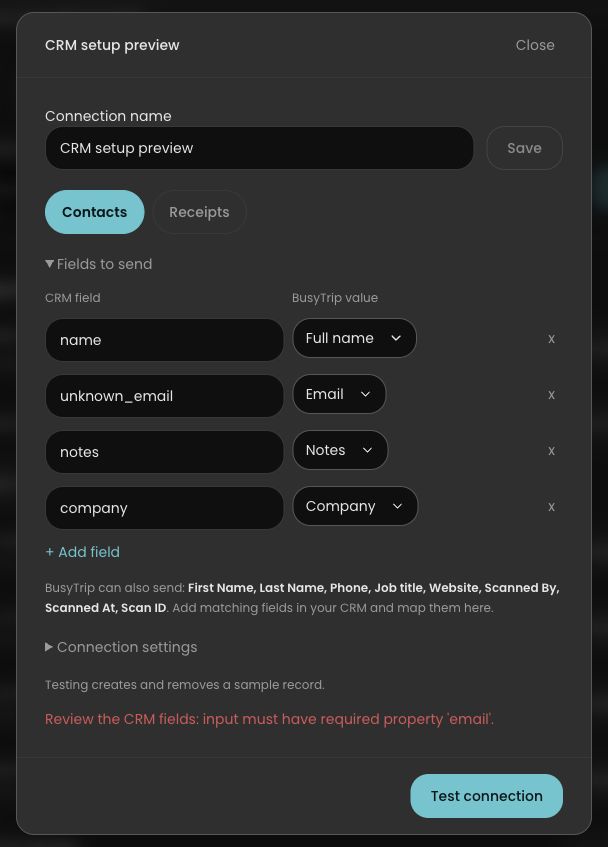
Open screenshot at full size Correct the field
Here the CRM expects email, so replace unknown_email with email and keep Email selected. The other settings need no changes.
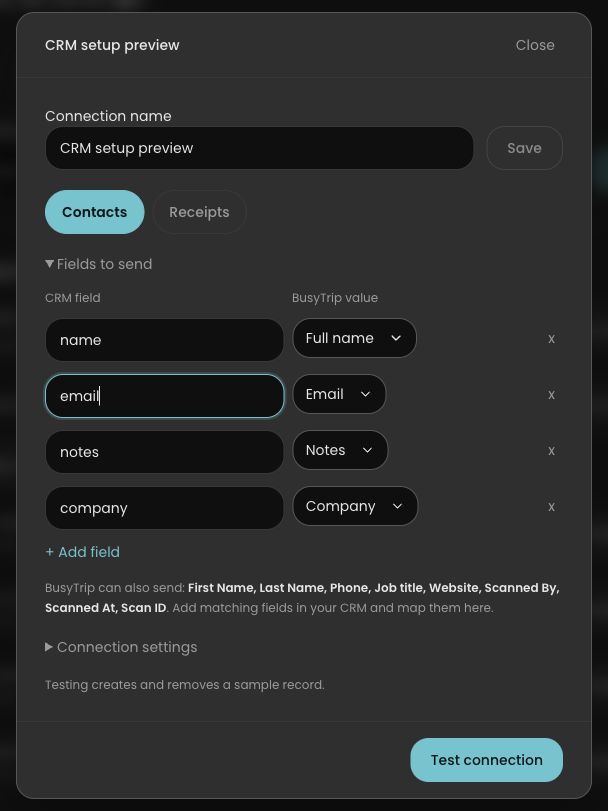
Open screenshot at full size Retest and finish
Click Test connection again. This correction passed; the sample was removed. Finish enables the connection.
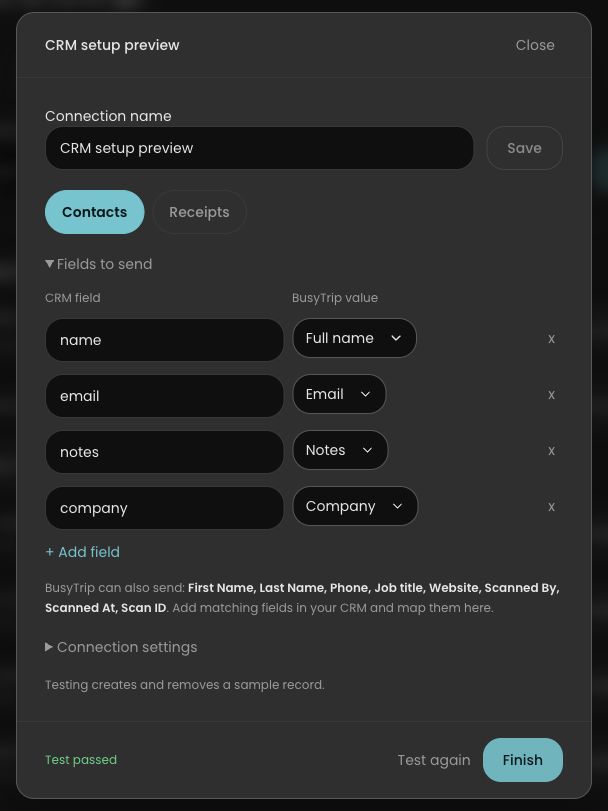
Open screenshot at full size MCP actions
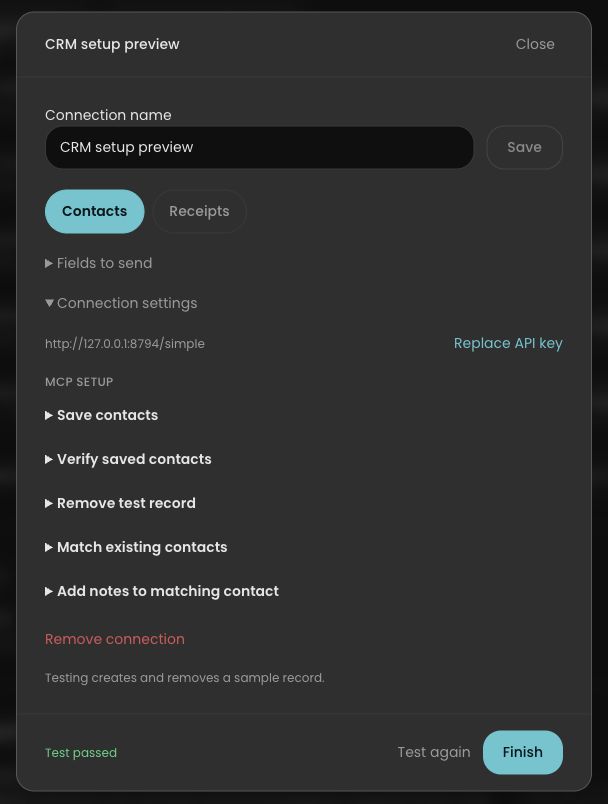
Open Connection settings, then expand just the MCP action you need.
Open screenshot at full size Matching and notes
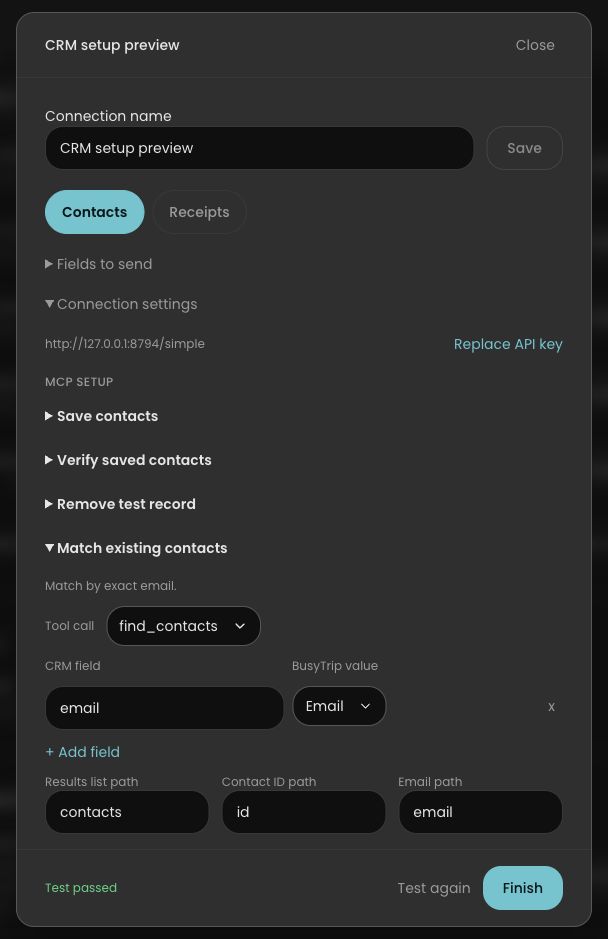
Each action has its own tool and fields. Configure supported lookup and update actions for exact-email matching and note appending.
Open screenshot at full size
Receipts
Connect your CRM
Use a CRM with a suitable receipt destination and MCP tools.
Open screenshot at full size Choose Receipts
BusyTrip matched these fields automatically. Open Fields to send only if you need to change them.
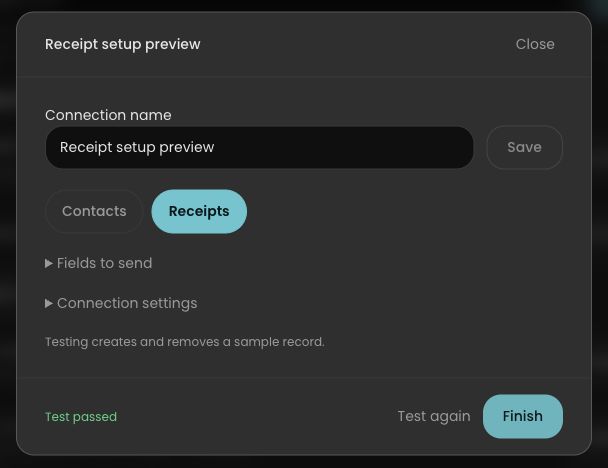
Open screenshot at full size Test, then finish
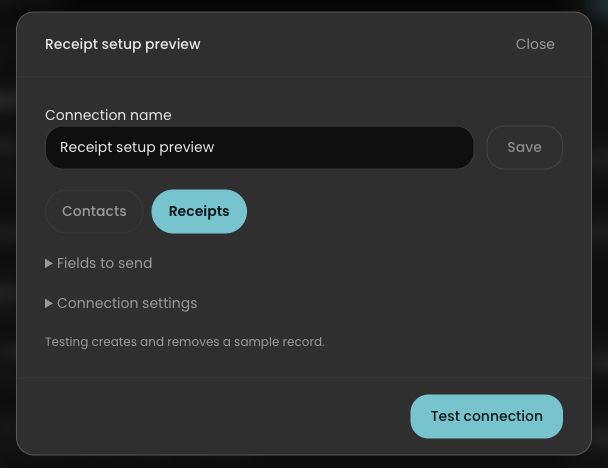
Run Test connection to create, read back, and request cleanup of a sample receipt. Finish after it passes; check the CRM if cleanup is uncertain.
Open screenshot at full size
Before you finish
The CRM must support creating a record, reading it back, and cleaning up the setup sample. Contact matching and note updates need suitable lookup and update actions. MCP compatibility alone does not guarantee a working connection.
Test the connection and finish only after it passes. The test creates a sample and requests cleanup; if cleanup is uncertain, check the destination before retrying. Provider audit or recovery copies may remain.
Only mapped fields and notes are delivered. Native Notion and monday.com destinations do not receive the original badge or receipt image.
Example screenshots captured September 19, 2026 in test workspaces. Your names and fields may differ. Custom CRM screenshots use a local test server. Use your administrator’s HTTPS endpoint for a real connection; tool and field names vary.
10 free scans a month. No card required.